Lately, I faced the task to make a long-term-support (LTS) backup of a FCP X “green screen” video project. I had two constraints:
- The result should take a “small” amount of disk space, only.
- It should be possible to alter background, text effects, image effects and so on without loosing quality.
The original data took about  GB, because of junk takes. But, I wanted to store
  –
– GB, only. Unfortunately, we chose to take very long shots, so that it was not easy to remove the junk from the FCP X project file (there are paid solutions for this, but the ones I found do not work with combined clips). Just rendering the video in good quality would solve constraint one (C1), but it is hard to make changes to such a file (C2).
Therefore I chose another road: Render the green screen scene with an alpha channel as one long video, in order to sort the wheat (good video) from the chaff (bad video). Using the original green screen instead of an alpha channel was not an option, since I animated the green screen video channel (e.g. moving it from the left to the right) which added black “letter-boxes”. An easy solution would have been to use the keyer to remove the green screen and add a new one via a green background (i.e., an artificial green screen). This can be rendered to a video and a second keyer can be used after a reimport. But this seemed kind of lame (in terms of unprofessional) to me. I wanted a cool alpha channel video as I have seen it in the making of of several films, with an additional video (channel), which is just black and white containing the alpha information.
So, I googled and there was surprisingly sparse information on this topic. There are some formats that should be able to contain an alpha channel like Apple Animation, Apple ProRes 4444, but they all have in common, that they take an unbelievable high amount of disk space, which violates C1 (and they didn’t work for me…). I didn’t find any HowTo or tutorial in THE INTERNET that could help me.
Challenge accepted. 🤓
What I did (try this at home!)…
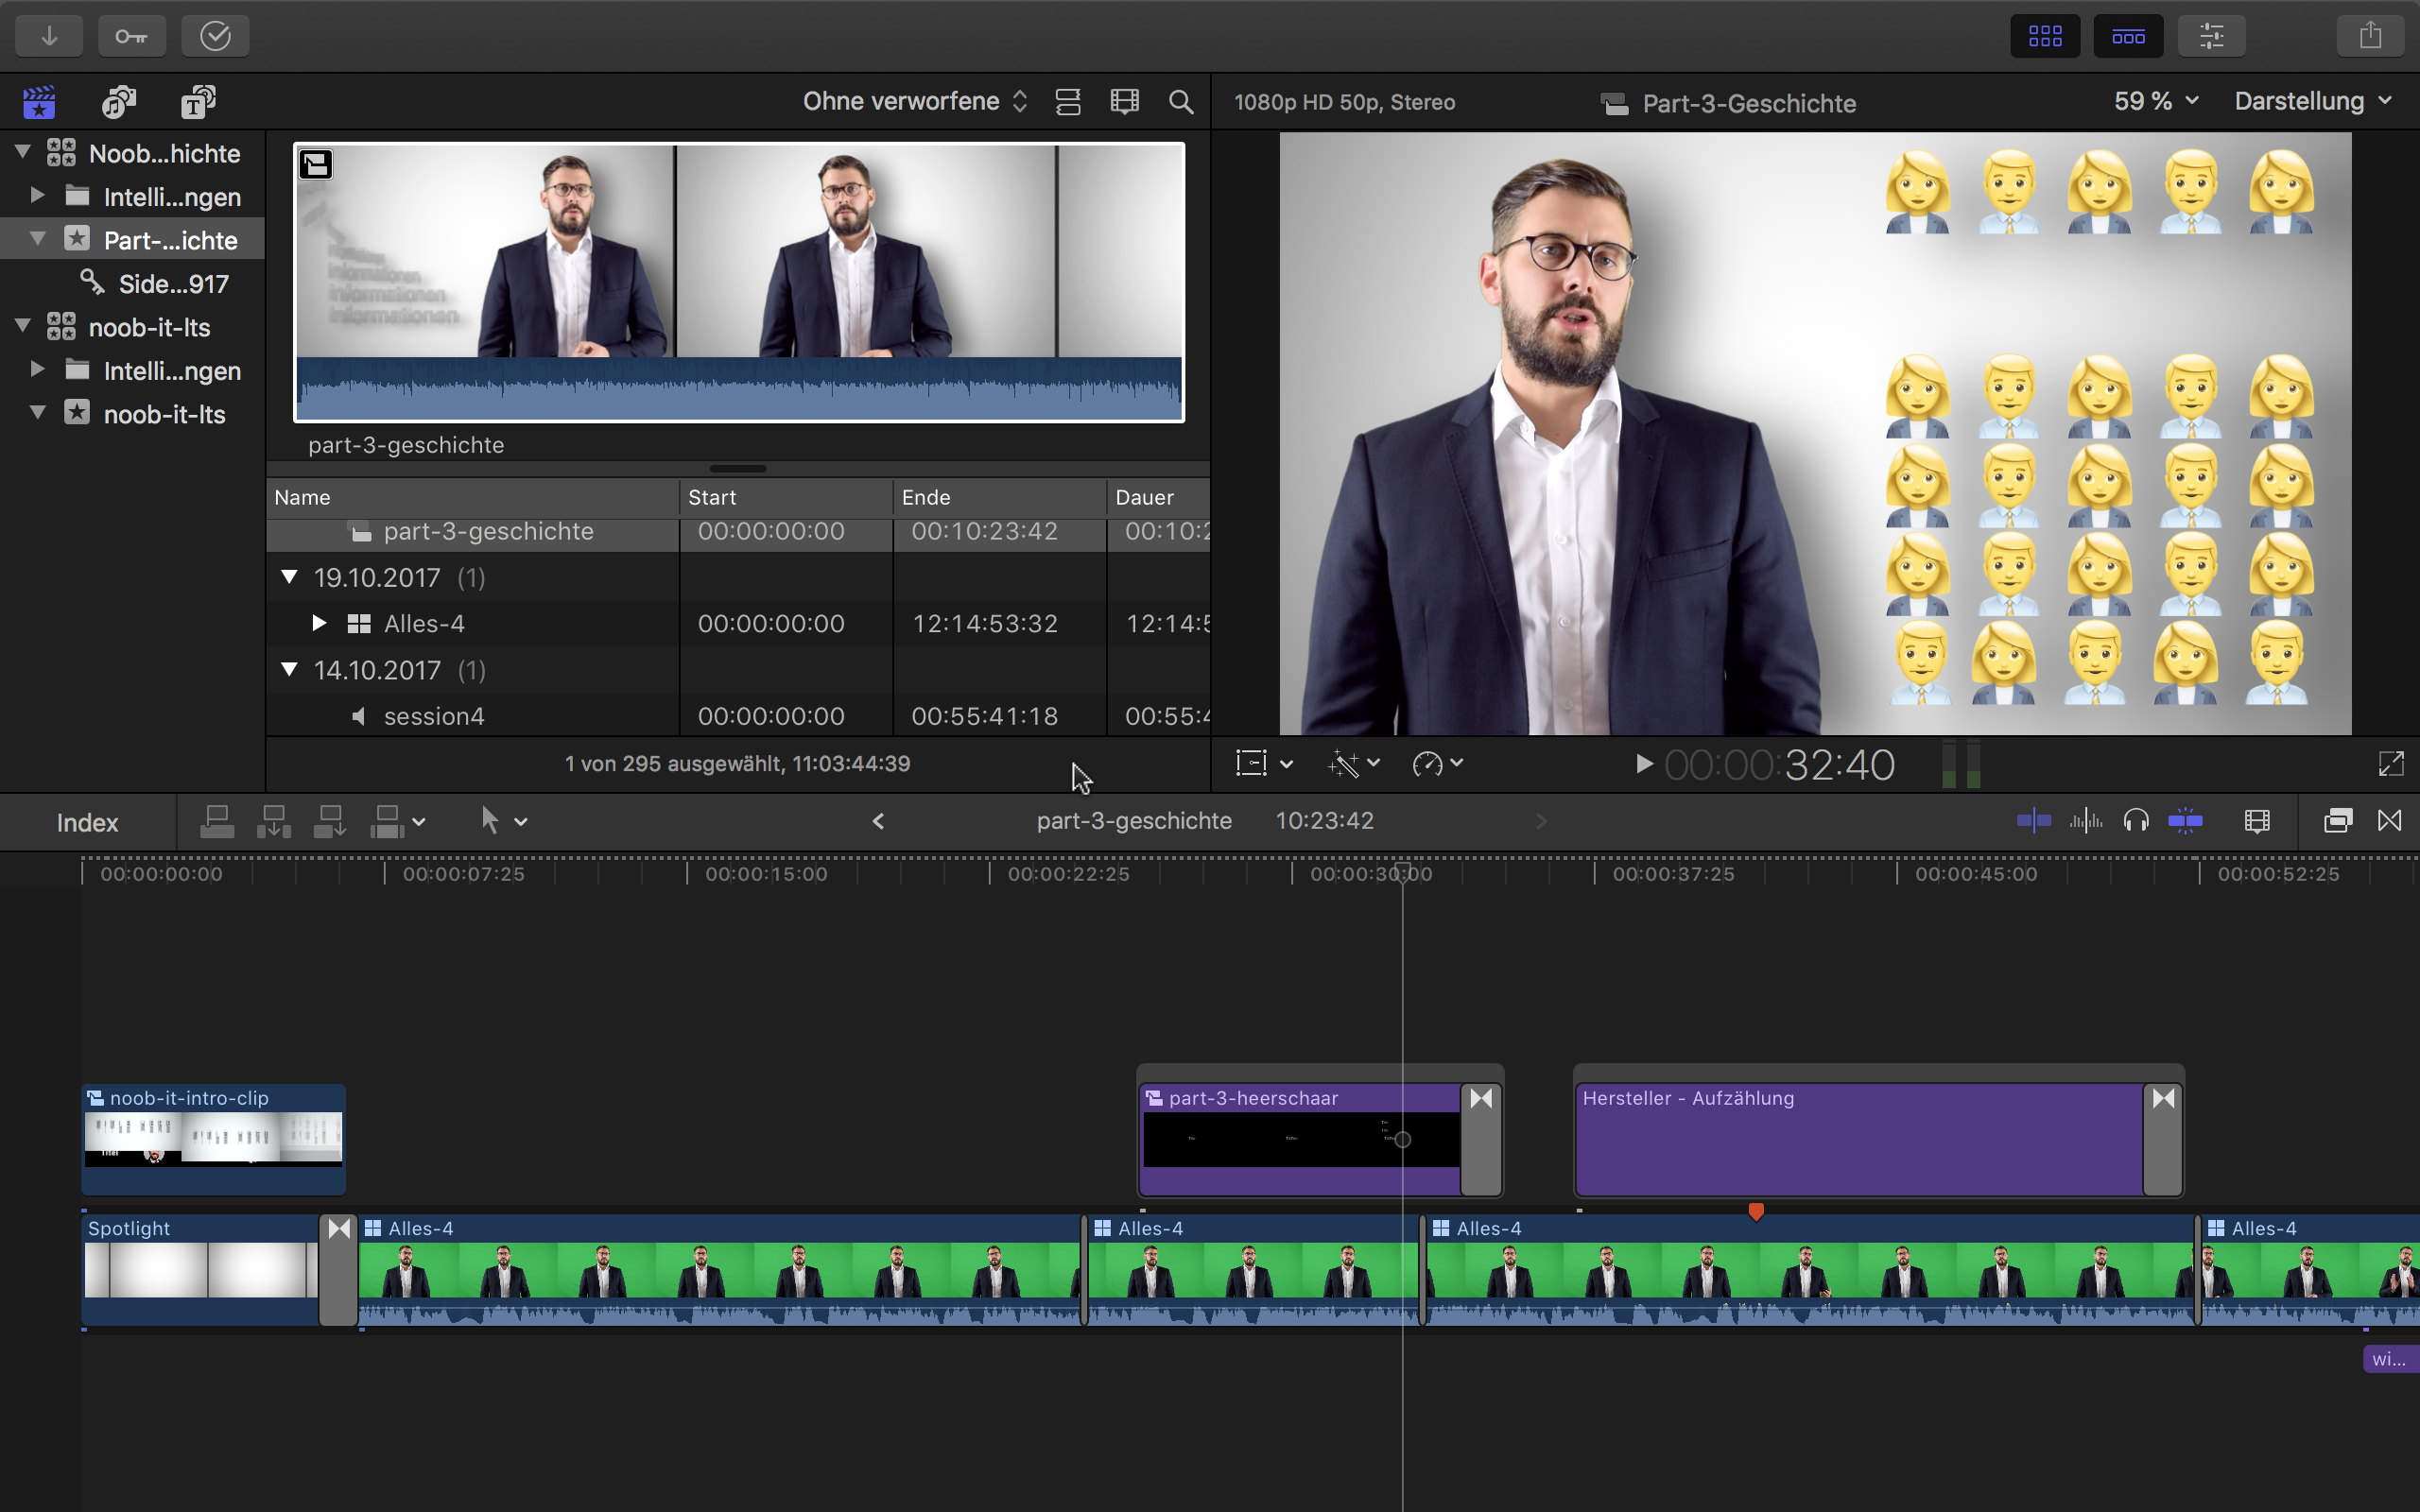
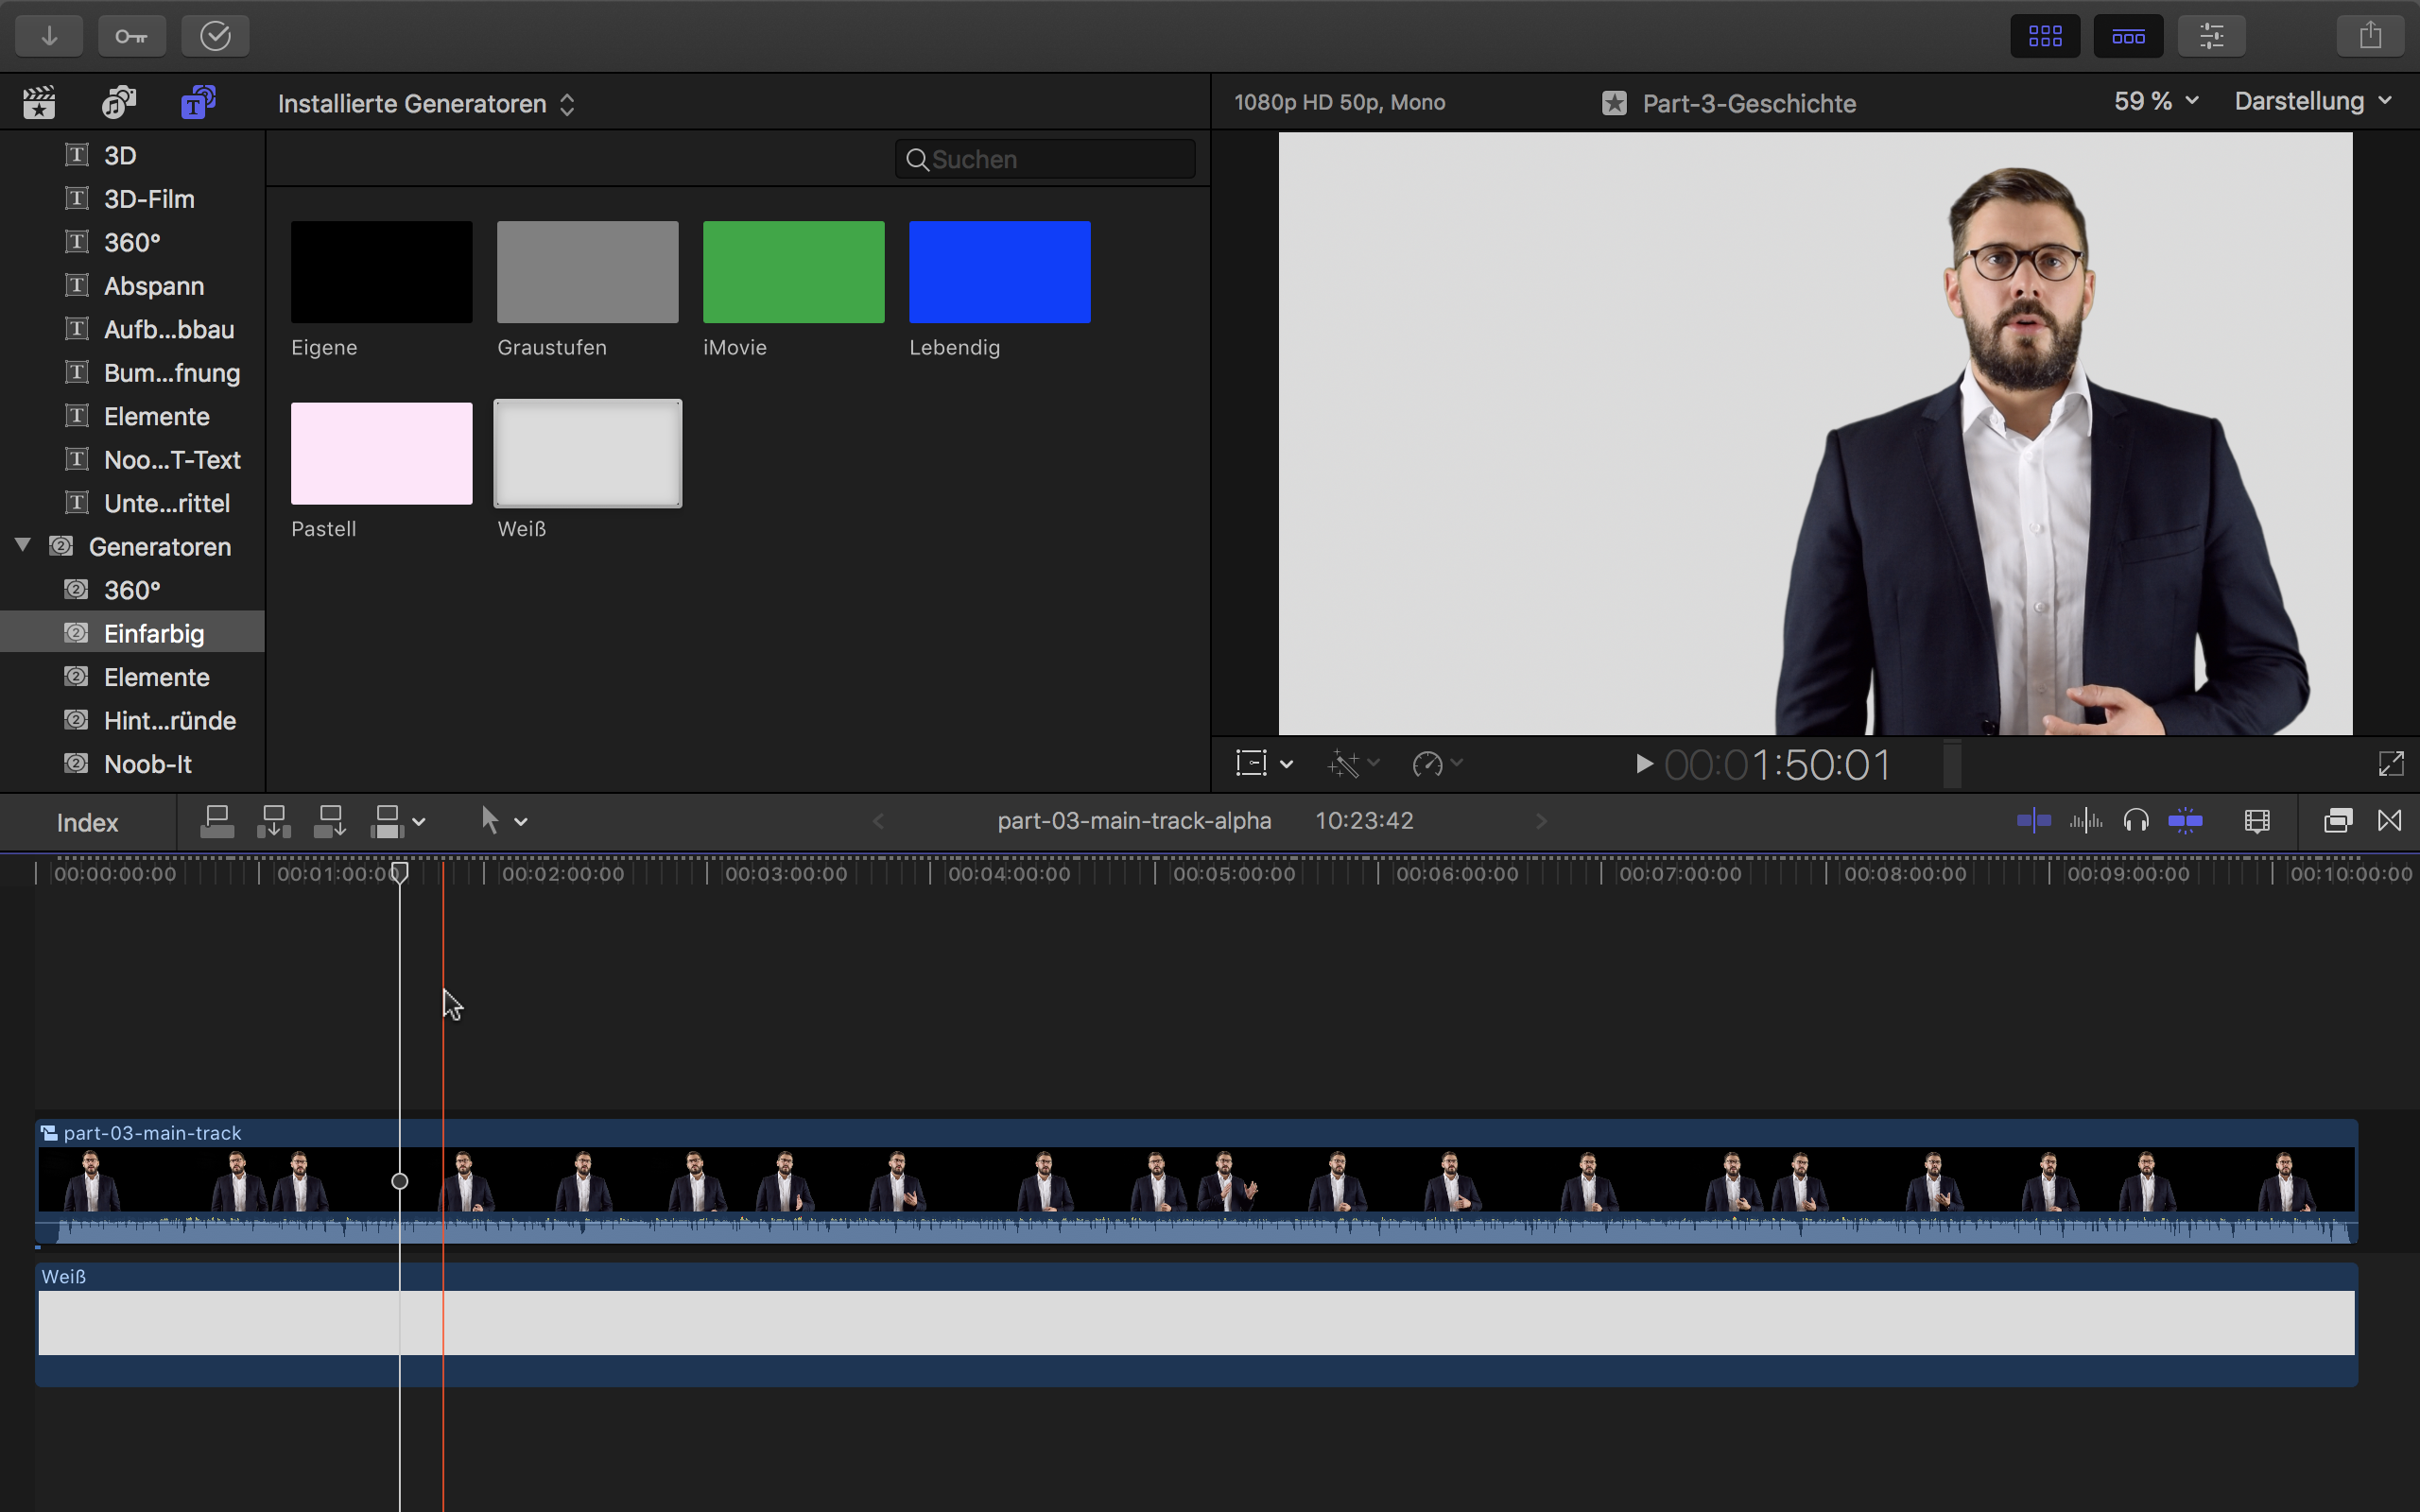
You can see the initial situation in the following screen (sorry for the german screenshots):
At first I create a new combined clip and copy everything, from my original timeline into this new combined clip ‘combined-all’. You can create a combined clip from an existing clip (or a combined clip), and replace the content with the clipboard content. Be sure to position the current video position in the timeline at the beginning of the combined clip before pasting the content.
Variant I
Then in your copy, mark everything in the primary storyline and create a new combined clip from it. This way, the main green screen content can be separated from all the effects and overlays:
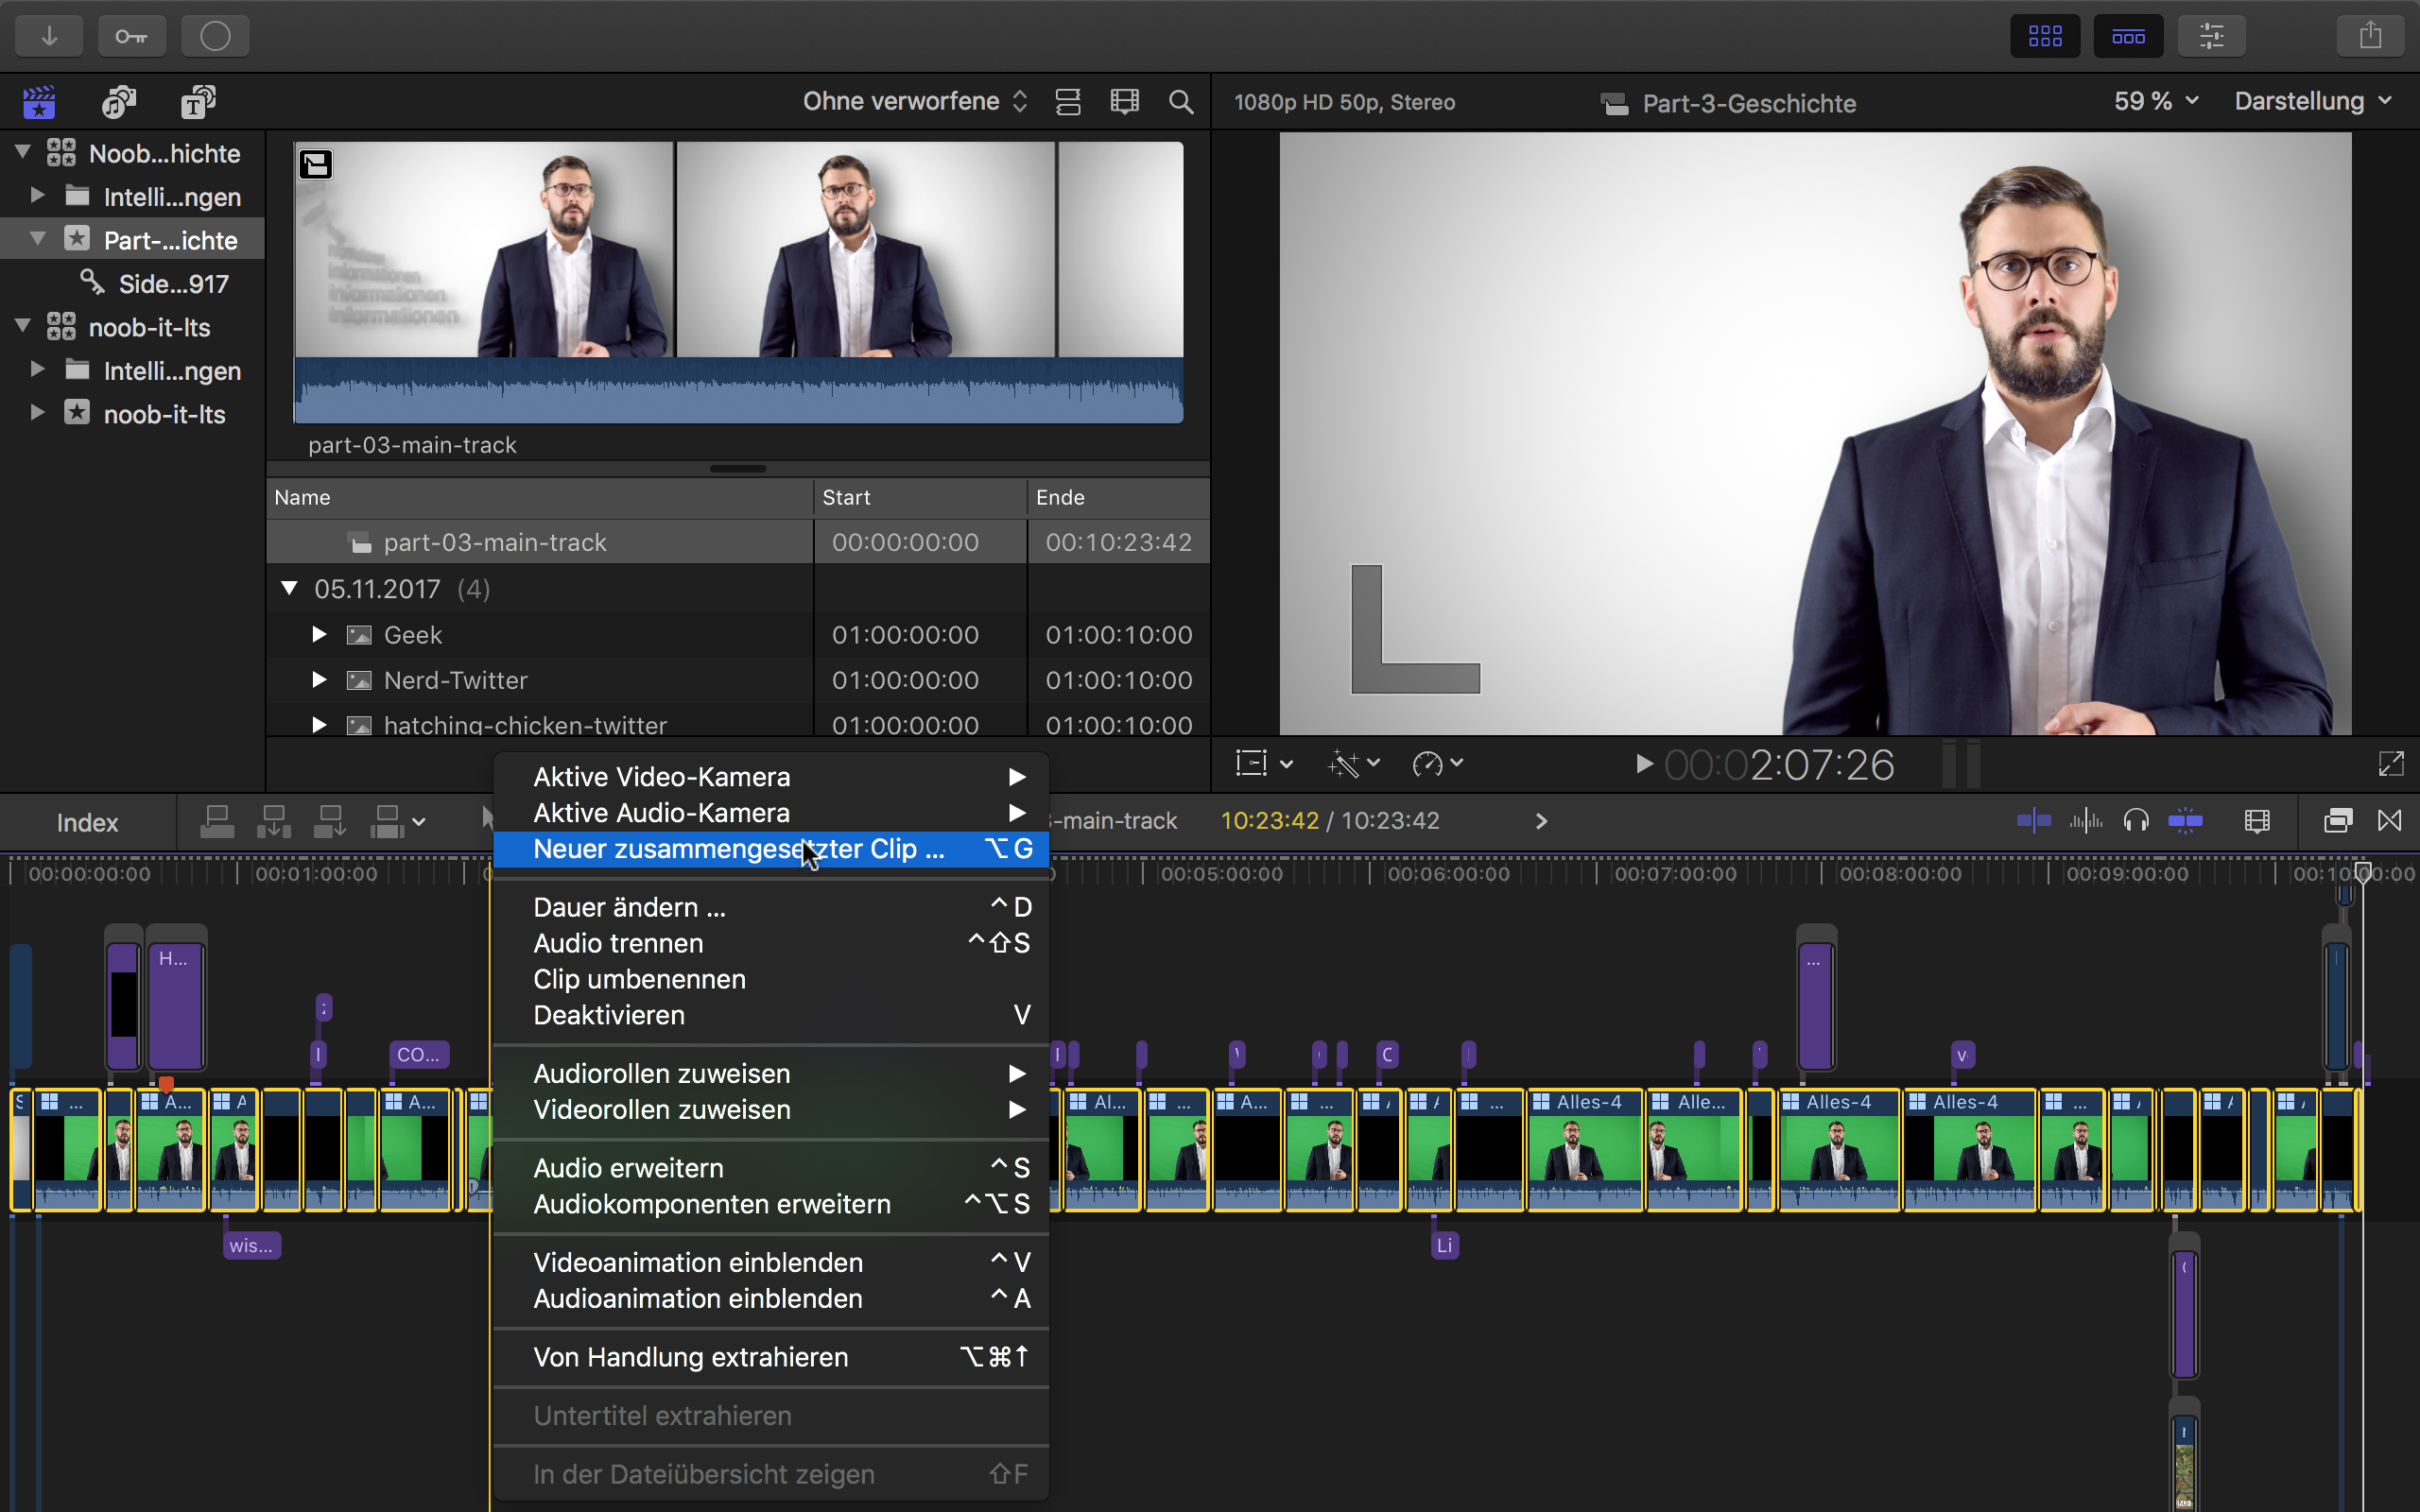
Now open up your newly created combined clip ‘primary-storyline’ and identify parts, that are not green screen videos. Mark these regions one by one and create combined clips from them (name them accordingly, so that you can identify the respective parts again, lateron. Remove the newly created combined clips from your primary storyline with SHIFT+Backspace. These parts will be replaced by placeholders, so that the video has the same length than the original one.
Edit: Variant II
Instead of creating a combined clip from the primary storyline directly and removing non-green-screen parts afterwards, you can extract the non-green-screen parts from the primary storyline upfront (via the context menu):
You can then create the combined clip from a “cleaned” primary storyline. This makes it much easier to replace the green-screen-content without touching “the rest” later on.
Next Steps for Both Variants
Last but not least (for both variants), go to “Edit  Remove Attributes” and remove color corrections, shadows and other effects you added to the video (despite transformations):

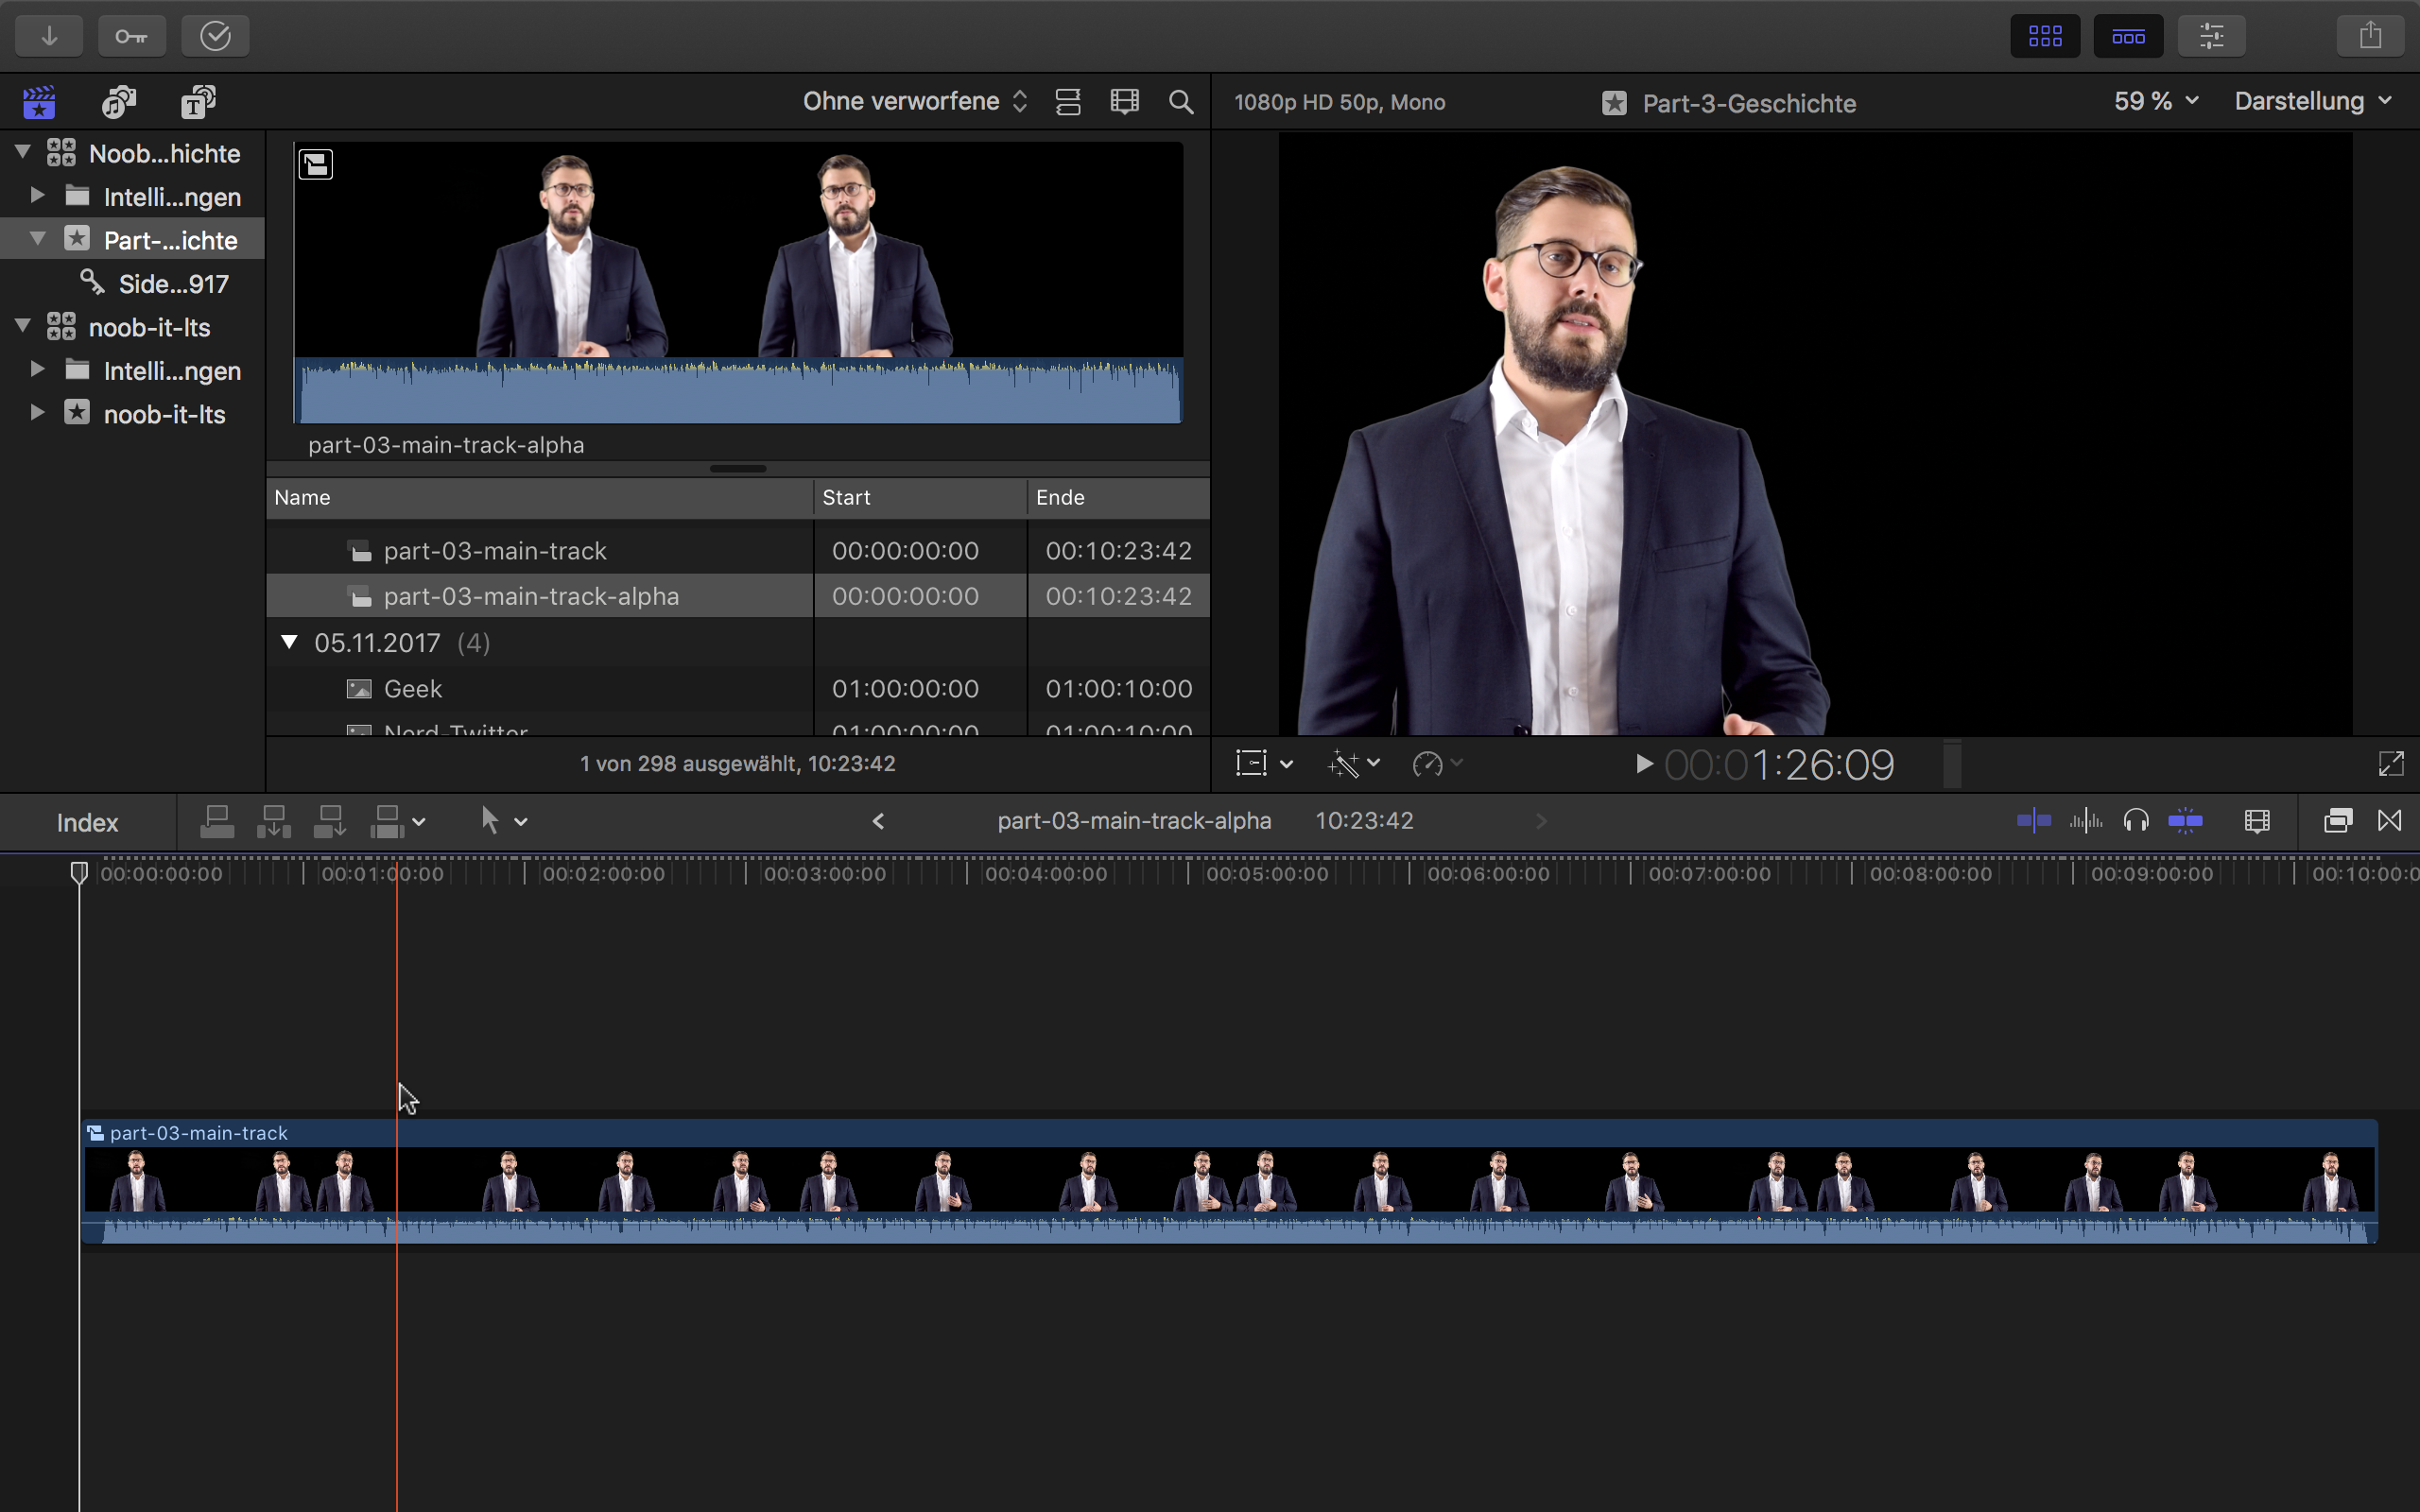
Now we have a separated primary storyline, that has the same length than the original video, but contains the green screen video only. So now you have to do something that seems to be a little bit over the top, but it is necessary (take a look at the caveats at the end of this article): Select the combined clip (in the media library) with the separated primary storyline and create a new combined clip from it. I added a suffix ‘-alpha’ to its name in order to distinguish it from the other one. The newly created combined clip will contain just the other combined clip with the separated primary storyline:
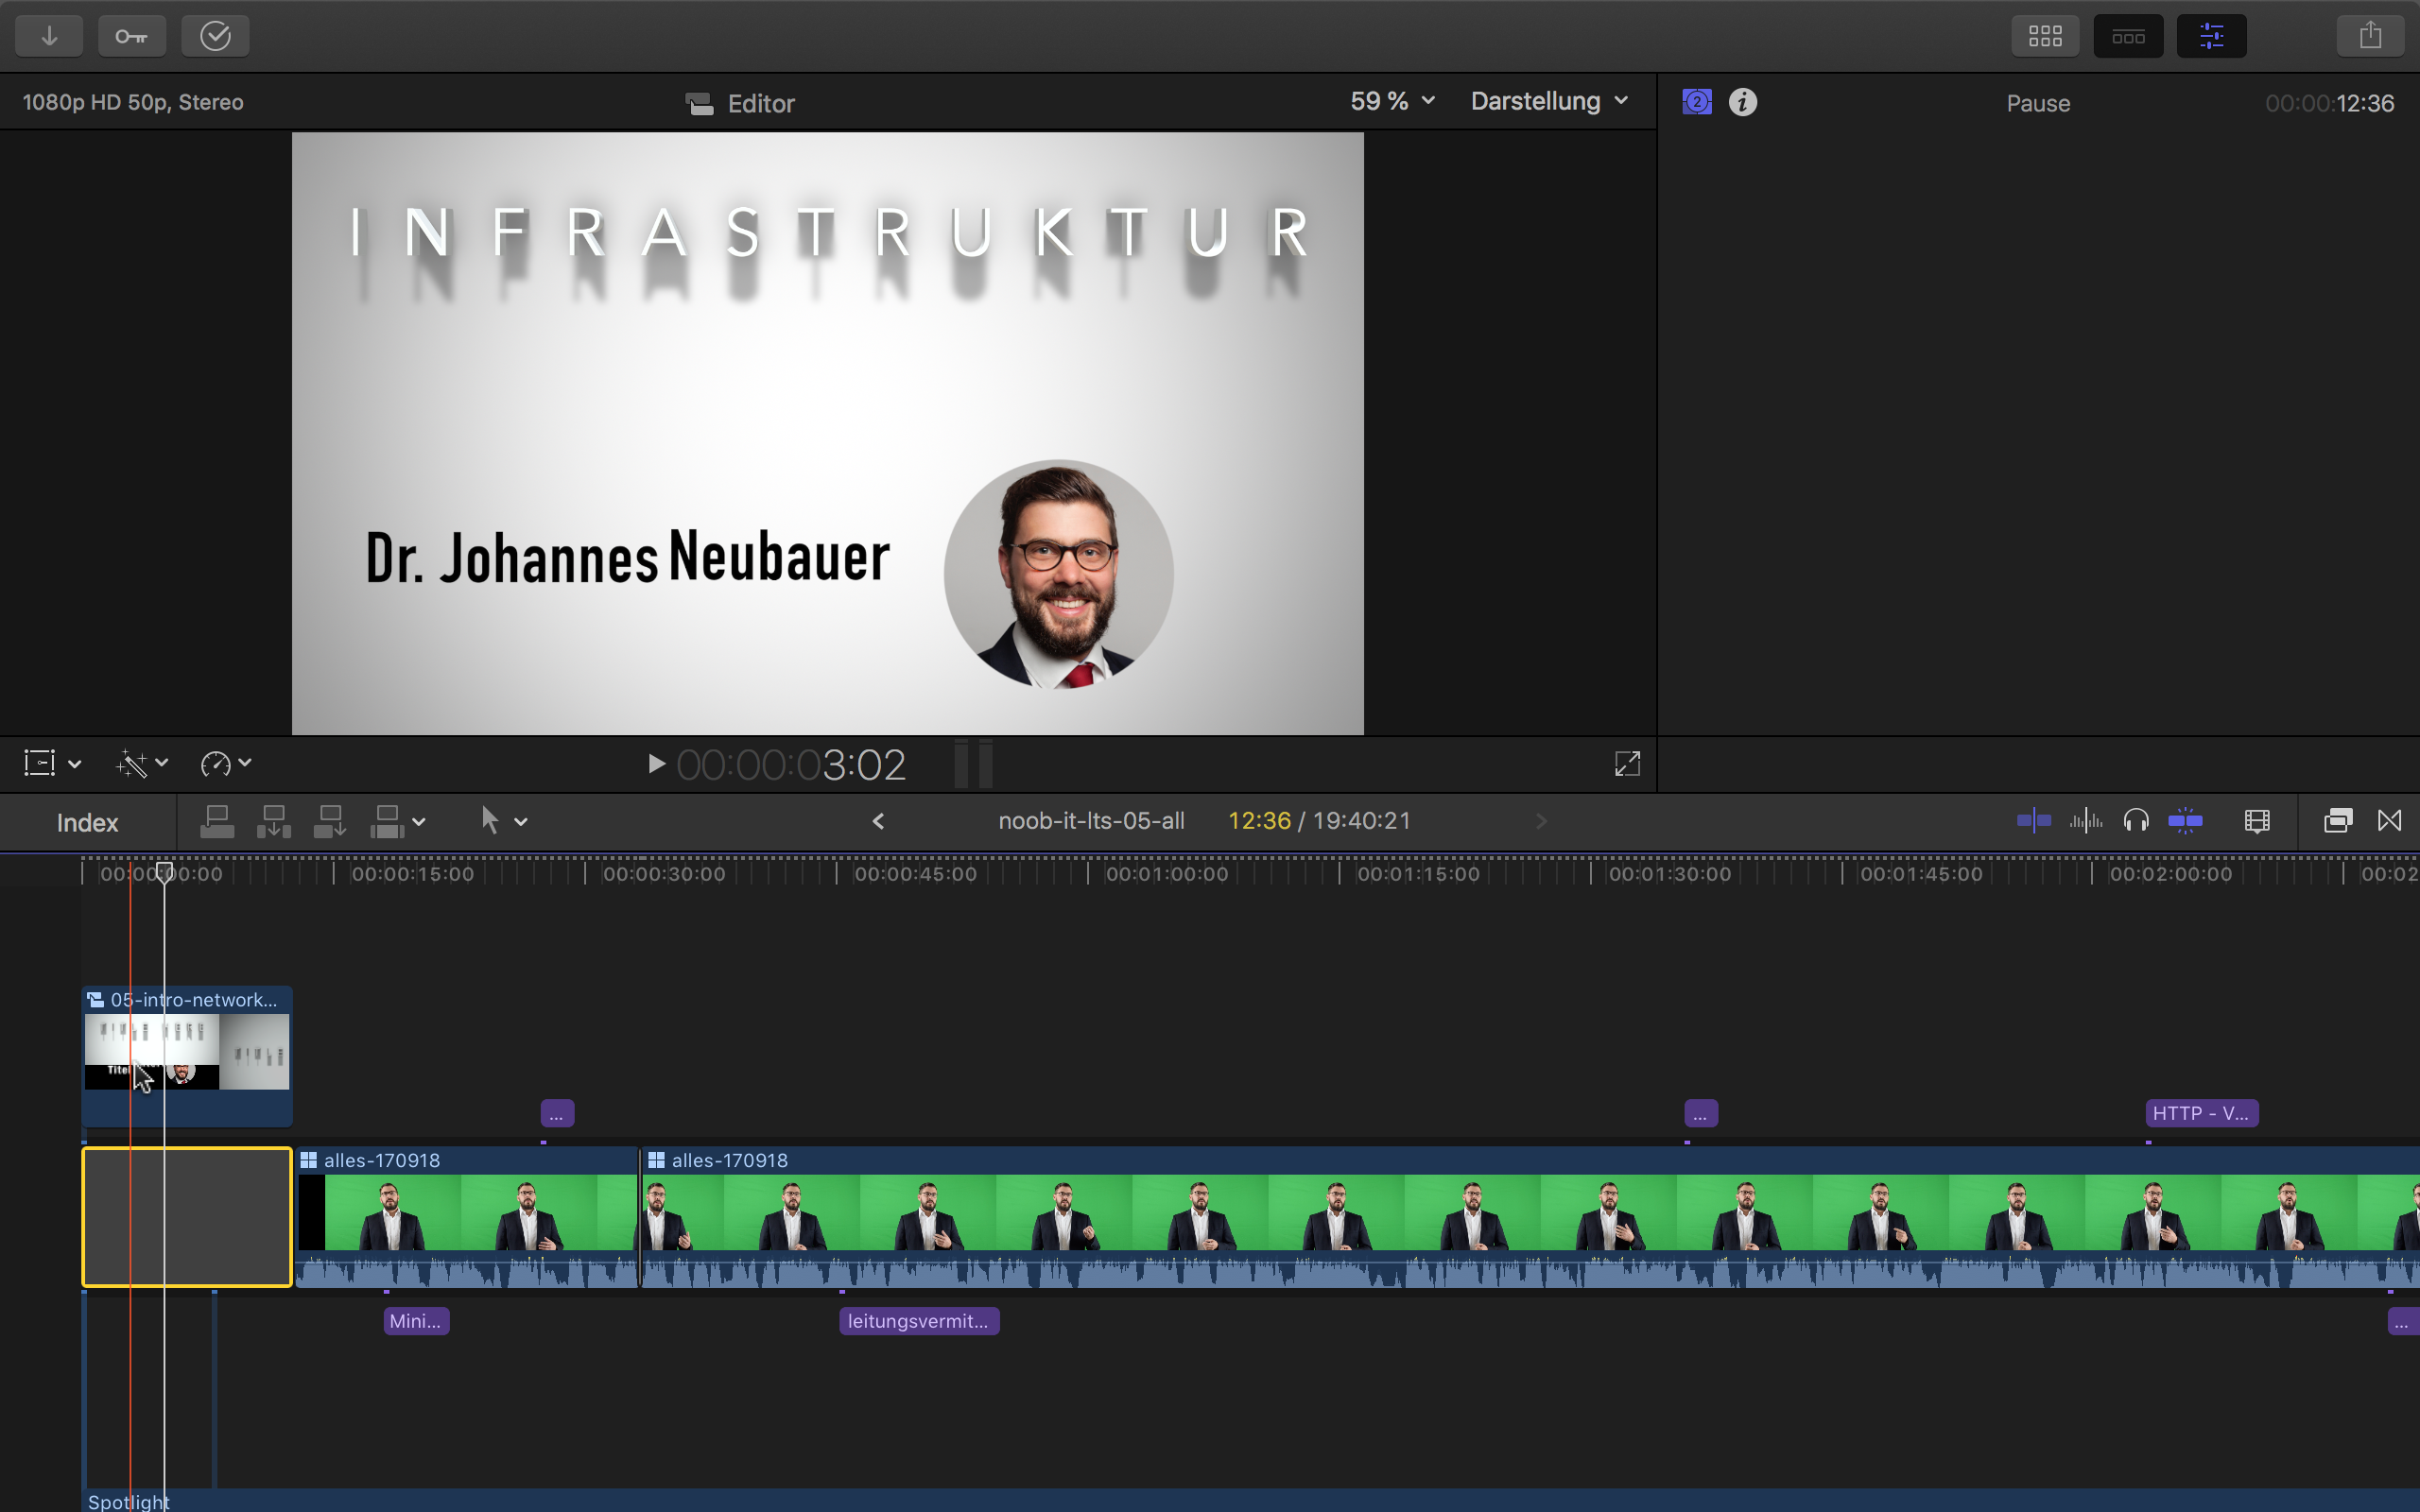
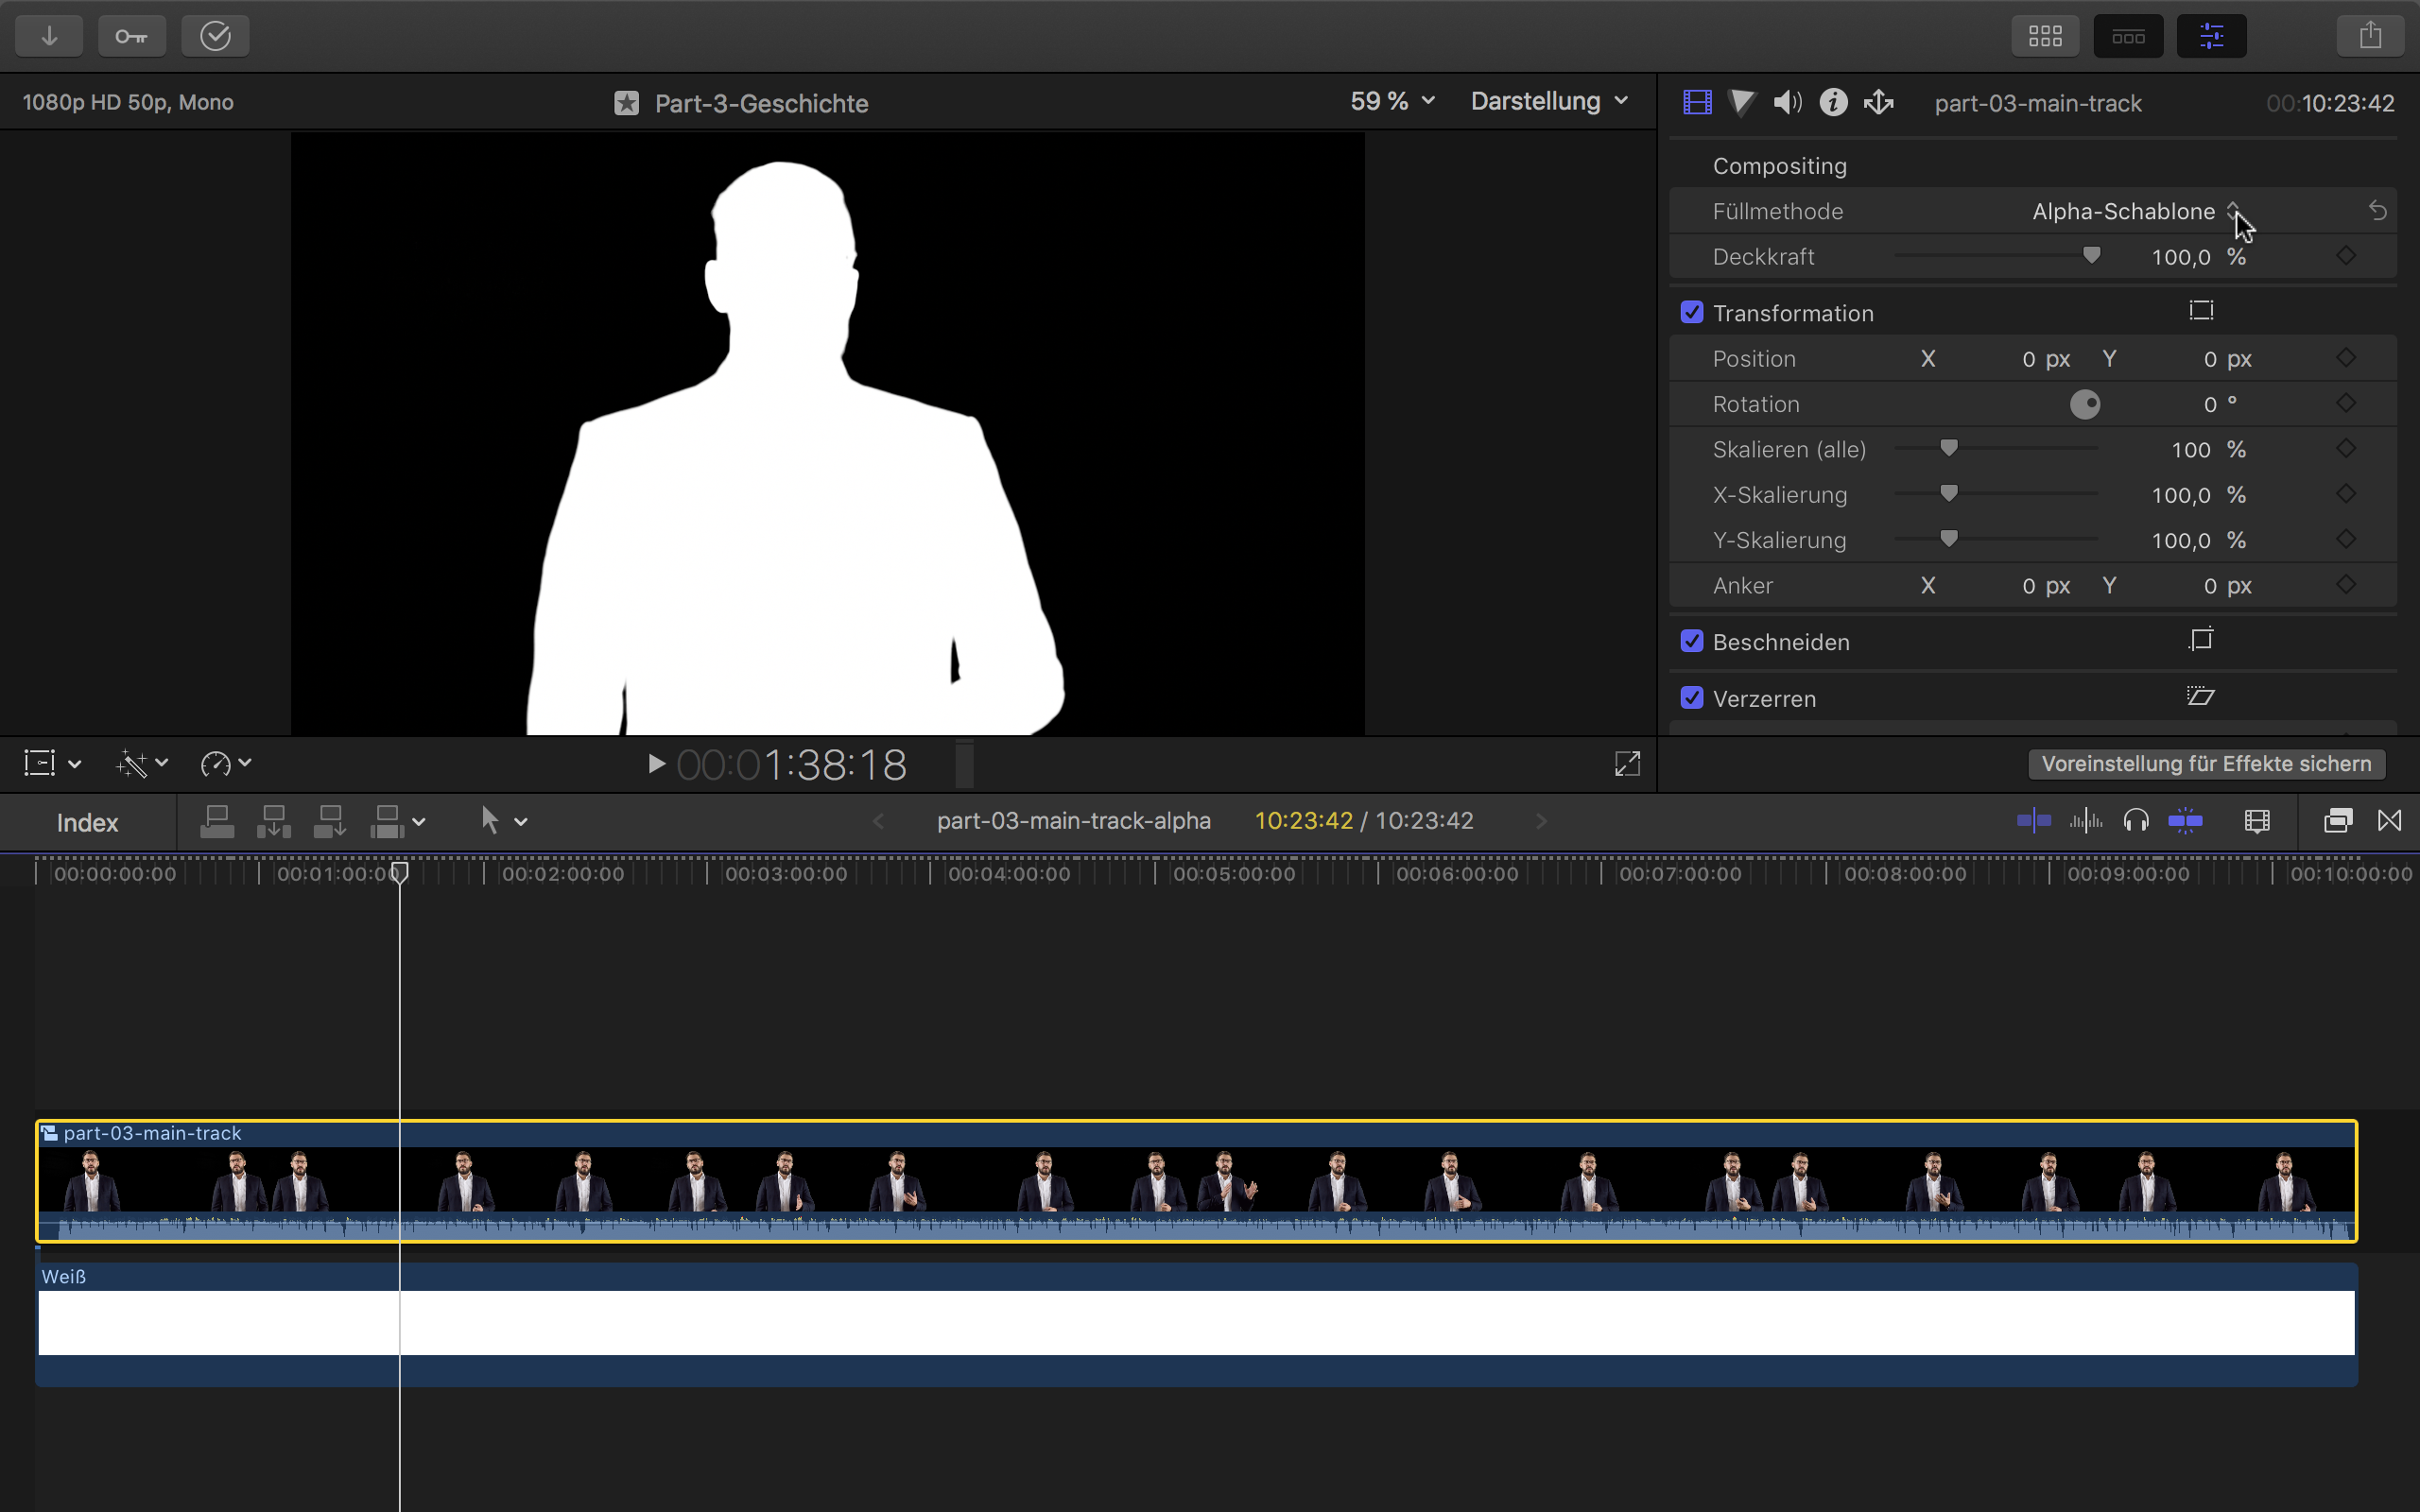
Open up the newly created combined clip ‘primary-storyline-alpha’, add a new video layer beneath the primary storyline from the single-colored generators called ‘white’ and change its duration to the full length of the clip:
The white bg is by default set to ‘smokey white’. Change it to ‘bright white’ in its settings. Select the combined clip in the primary storyline and set the fill method in the compositing area to alpha mask. The result should look like this:
Now render both combined clips ‘primary-storyline’ and ‘primary-storyline-alpha’.
After creating a video of the primary storyline as well as its alpha channel as a separate video, we need to replace the existing primary storyline in the video with effects, with our new versions. This can be done in very different ways. We will create a new project and copy the complete video (i.e., ‘combined-all) into the project. Then we will do some copy actions:
- go into the newly created project and replace the combined clip in the primary storyline with the video ‘primary-storyline’ we rendered before.
- create a new combined clip from the clip in the primary storyline ‘primary-storyline-wrapper’
We do these wrapping actions in order to avoid issues described below in Caveats. So, go into the newly created combined clip, select the rendered video (the only content) and add the video effect image mask:
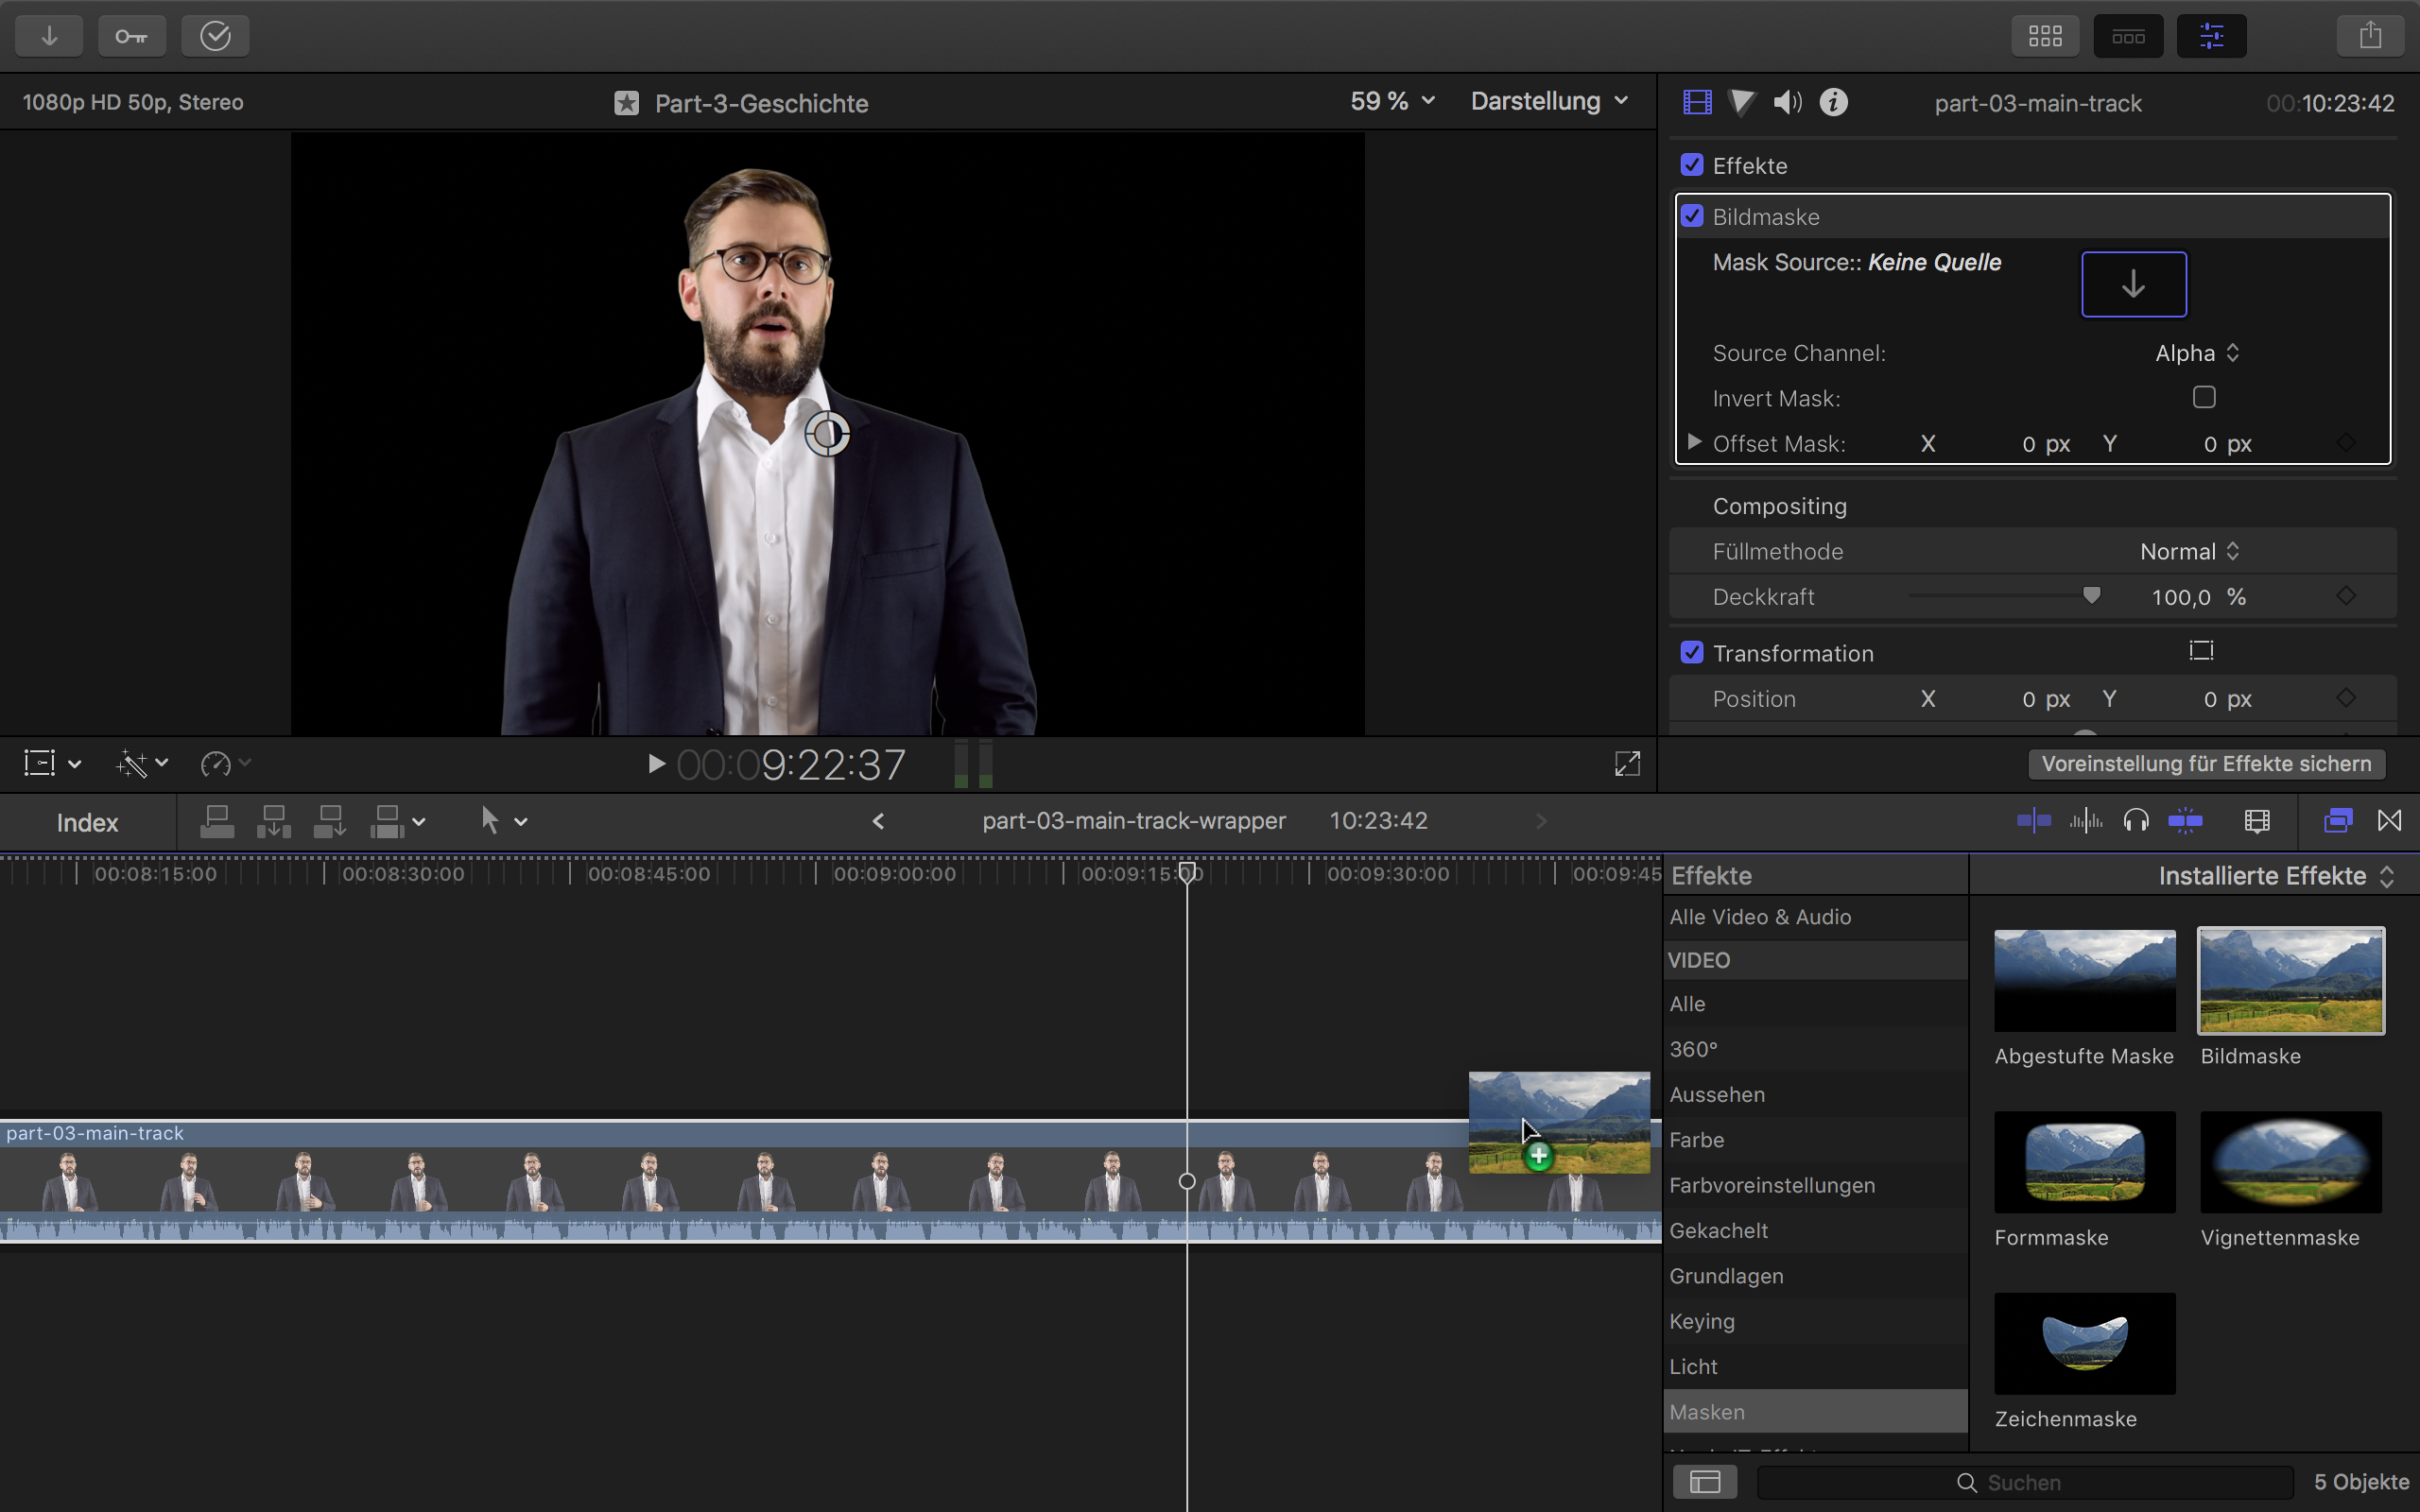
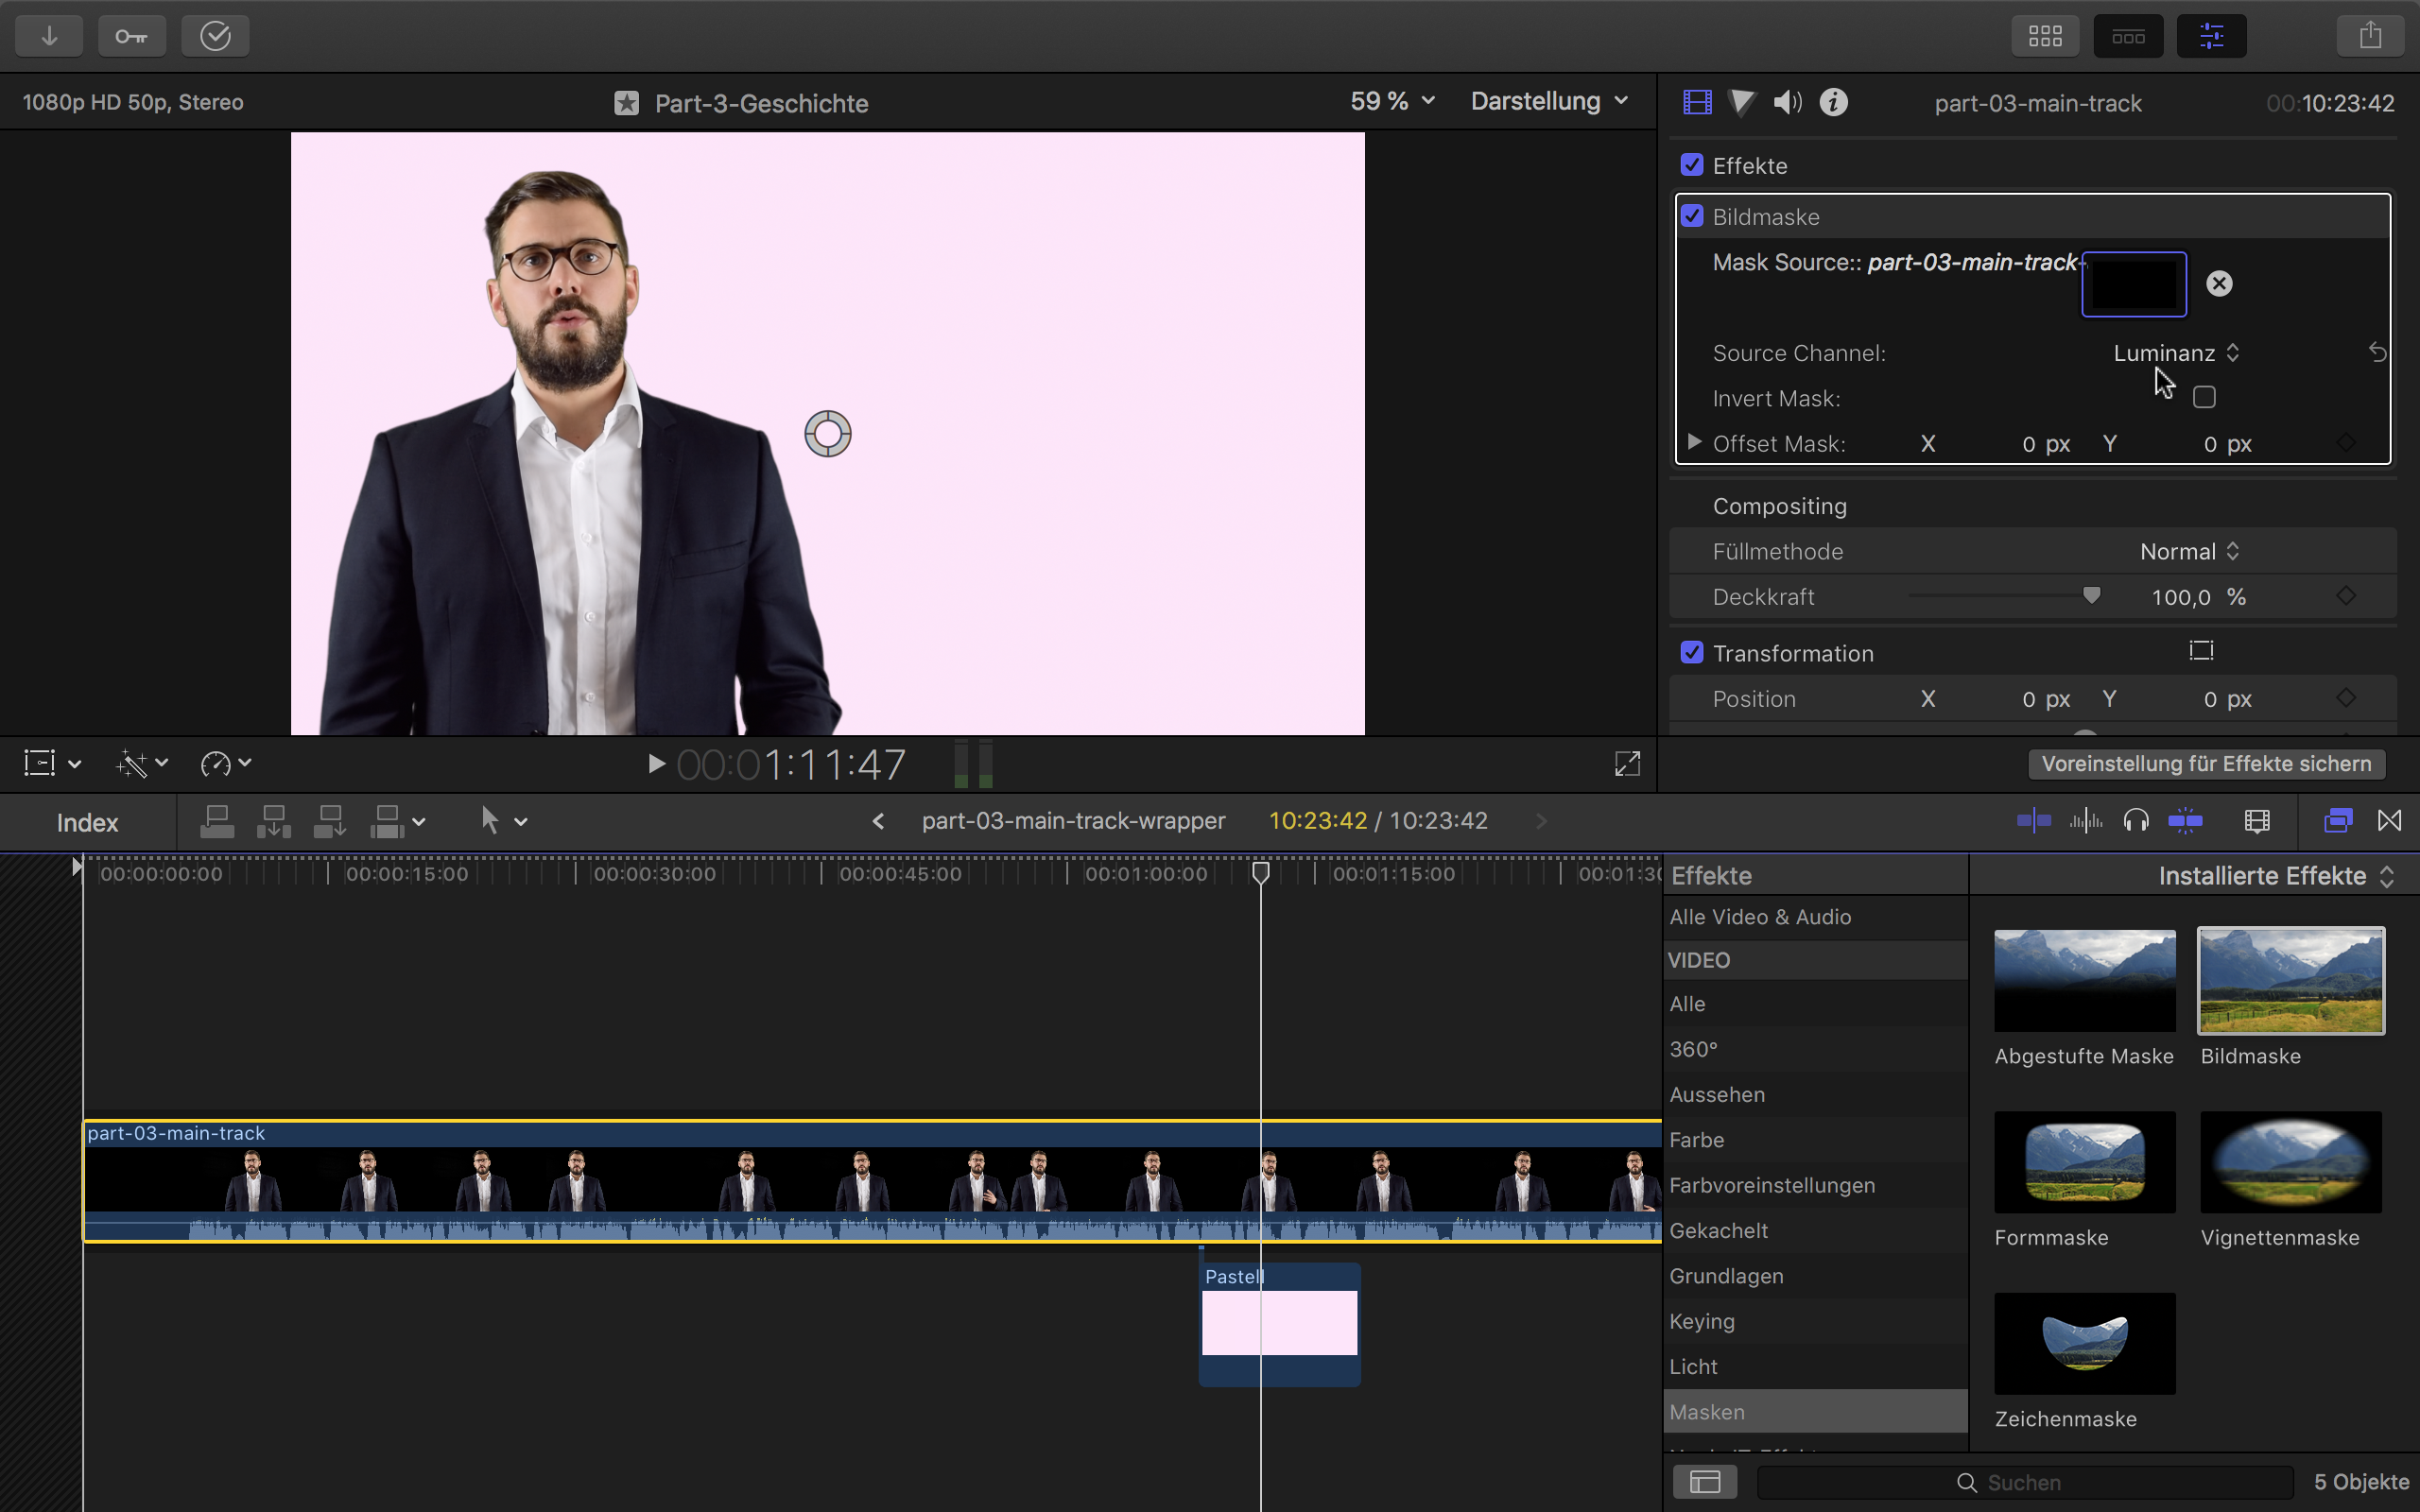
Add the rendered alpha-channel video as source and change the source channel to luminance. In the screen shot I put a background, so that you can see the transparency effect:
Back in the project, you will see, that everything looks nearly like the big version in the first place. Now you can add back the non-green screen combined clips we extracted in the beginning (only necessary in Variant I, see above) and add back the video effects (in my case the color corrections and the drop shadow effect). You can even cut the video in the primary storyline of the project and add transitions to it (but be careful and respect caveat 3.).
Last but not least copy over the project to a new media library. All the ballast sheds… and you have a small media library with a lot of the editing possibilities preserved. I achieved a more than 50x size reduction.
Caveats
There are some rules, you have to follow in order to make the alpha channel video work:
- Do not add the alpha mask compositing effect directly onto a timeline, where you cut your video, as effects like the flow transition won’t ‘survive’ the alpha mask. You will see just black video instead of a white alpha channel video in front of a black background. Create a combined clip from your timeline and add the alpha mask to the combined clip instead.
- Do not cut the reimported video with the image mask, because the masking video (i.e., the alpha channel video) will start from the beginning after each cut. Instead, create a combined clip from the video and cut the result.
- Do not add transitions to the combined clip containing the rendered clip with image mask. Instead, add an invisible clip (e.g. a black clip with opacity set to 0%) and do the transition to that clip.
Exciting 🤓.